Wednesday, 14 November 2012

Wedding Card Makeover

Hello to all my Lovely Readers,

I am BACK!!!! So sorry for MIA over the past two months!!  It seems that “this sentence” has been a common starter throughout my blog these few months. At the same time, I also want to say SO SORRY to all my blogger friends to not visiting your lovely blog.

Last month, I moved in to my new HDB. In Singapore, we called an apartment as HDB (Housing and Development Board). Over here, seldom people will have enough money to buy a private / landed house. So, most people will apply HDB and pay the installment for like the next 30 years / more.

Anyway, last month I and fiancé went to T-Dragon for our wedding card selection. Wedding card design is one of a perk that we got when signed our wedding package with Grand Copthorne Waterfront (printing service is not included).  The printing service costs us around S$140 for 105 cards.  

Frankly speaking, We I feel that the card’s design is too plain and simple =(

So, I decided to makeover the card to my personal preference. I want it to have classic and rustic feeling.

Original Design
  • A wedding card with shiny gold hot stamping on one side
  • It contains plain text and with a single color printing
  • Plain Cream envelope.
After Makeover:
  • STILL, a wedding card with shiny gold hot stamping on one side
  • Asked them to add two of our customized logo which was designed by ME.  To print a logo, they charge us additional S$10.00 for each image. Since, I requested two images; we need to pay additional S$20.00 for printing.
  • Cream envelope with an additional of liner. It was done by me as well. I spend three days to complete this task. Paper craft bought from Spotlight. Total it cost me S$30.00.
  • And last, I use a wax stamp to seal the wedding card. Bought the Manuscript Pen Sealing Gun Wax Sticks from Maple Tree House. I love love love to shop from there. Sometimes, their products and prices can be too'delicious' for me to ignore =P
Proudly present my wedding card (after the makeover):


Thanks for visiting my blog today. Hope you all have a great Wednesday..

Monday, 17 September 2012

Ribbon Rose Wrist Corsage and Boutonniere

Hello to all my lovely friends!!
 
Today’s post is about my December’s wedding.  
 
Our wedding will be held on Grand Copthorne Waterfront Hotel – Galleria Ballroom. I truly hope that it will be a simple, cozy and small wedding dinner. We will invite 150 peoples to celebrate our special day. The wedding theme is simple, rustic and vintage. I would love to see the combination of champagne (pale brown) – pale pink – white as my wedding color base.
 
We will have two sections for our pre-wedding picture activities. 1st section was with My Dream Wedding Singapore. It was done on June 28th 2012 with Jackson as the photographer.
 
For the 2nd section, we will ask my brother (Danny Tan Photography) to help us. We will do this activity on October 2012. I will share with you all once the pictures done!!
 
Let me tell you my DIY wish lists:
 
  • 10 Wedding Book for Kids: 95% complete, design part complete, left printing only. Will share with you once it complete.
  • Accessories for my Polaroid photo booth: 25% complete.
  • Wedding Guest Book: 0% complete. I still don’t have any idea of how to complete it.  
  • 10 sets of Piggy and Puppy Finger puppet for Kids: 10% complete, 1 set of finger puppet complete, left 9 sets to complete.
  • Wedding Place Card: 0% complete. Don’t have any idea yet.
  • Ang Pau Box: 0% complete. Don’t have any idea yet.

 Proudly present my creation of wrist corsages and boutonnieres for my wedding helper:


Materials:
 

  1. Ribbon roses that I DIY myself. The ribbon cost me S$1.80 to S$2.00 per meter at Spotlight 
  2. Pearls, Burlap and Twine

Saturday, 8 September 2012

DIY Flower Brooch

Good Morning, All!!

Today is September 8th, 2012. It means, my big day will be arriving in another three more months. OMG, how time flies soo fast!! After my big day, Christmas and New Year will come too!! Haitz, I even haven't prepared any Christmas and New Year card yet!! Well done, Tan =P 

Anyway, just a quick post today! I was cleaning my room last week. And realize that I has many clothes that I can't fit anymore.

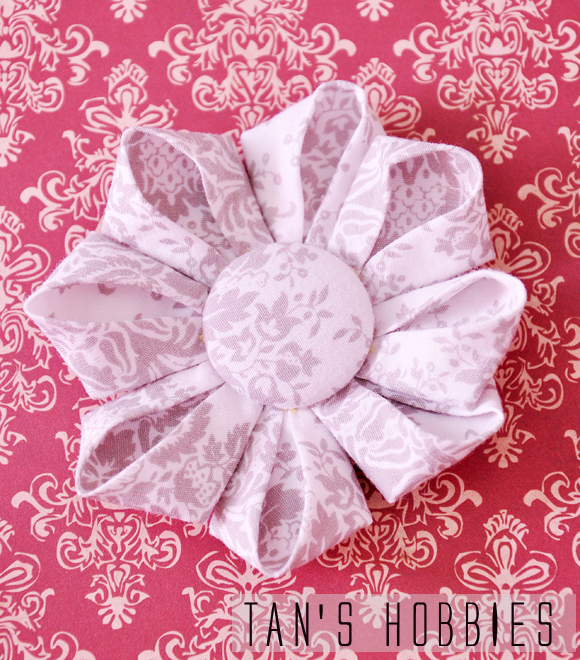
Proudly present my creation of Flower Brooch:


Material:
  1. Unused Fabric. You might use paper as well.
  2. Thread and Needle.
  3. Button. I bought this DIY button kit from Daiso Singapore.

And here is the "step by step" procedure of how to make the flower's petal=)


Friday, 7 September 2012

Piggy and Puppy Finger Puppet for Kids

Hello Everyone!!!!!

Just a quick post today! I want to share with you my creation of Animal Finger Puppet.

We are going to have about 10 kids at our 3/4 hours reception. So, I want to give them something fun to do. Beside DIY a Kids Activity book, I also make an Animal Finger Puppet for them.

Here is my creation of Piggy and Puppy Finger Puppet.


Why I choose to make Piggy and Puppy? It just because I was born is boar/pig year and my soul mate was born in dog year.

Hope all the kids will love it =P

PS: Until now, my “follower” section is “STILL” having a problem. So, I decided to join Linkys. If you have linkys account, I will be so happy if you add me as one of your friend =)

Thanks for visiting and hope you all have a great weekend!!

Thursday, 2 August 2012

Wedding Paper Tag

Good Day to Everyone!

By now, I should declare myself as the worst blogger ever =(

For the year 2012 (which is from January to July), I could only managed to publish less than 30 posts!! OMG! I know 30 posts in 7 months are so damn less. I feel so sorry to all my lovely readers for my MIA these few weeks.

Anyway, a bit update about my wedding!!

By the time I am writing this post, my 150 paper bags and the 150 paper tags are done(Yuppie!!!).


As most of you know, I will be getting married this 8 December 2012. I am greedily happily planning to DIY so many things. For now, I just completed the paper bags and tags, but I still need to make another type of tag to be attached to our wedding favor. I also still need to make the place card, design the guest book, wedding corsages and boutonneire for my helpers, etc., etc. !! I hope I can complete everything in another 3/4 months!! 

On my special day, I will be the bride (of course, hehehe) and the wedding planner as well. Hope everything will be smooth!!

PS: A big thanks to one of my lovely and super talented, Annette!! Last month, she sent me a super duper lovely package. I am so happy!! Thank you so much, dear!! I love her DIY card so much. She is the queen of twines and her coloring skill is superb! Please visit her blog to view all her lovely creations.

Wednesday, 11 July 2012

Blue and Black Wrist Corsage

Good Day to all my lovely friends!!

Today I want to share my other creation of Blue - Black Wrist Corsage. I love making those roses and hope everyone will love to seeing it =P


Hope you all have a great day ahead!! Thanks for dropping by today =)